Heel lift in snowboard boots is definitely something you want to avoid, and there are many ways to stop it. There are simple alterations that you can make to your existing boots to better hold your heel, or it might be that the problem stems from boots that are either poorly fitting or too big. In this article, I’ll explore what causes the problem of heel lift and the best way to fix it for your particular boots.
Your Snowboard boots' main job is to hold your foot securely so that all the movements you make are translated directly into your board giving you maximum control. This means stopping the foot sliding forwards and backward, stopping it rolling from side to side, and maybe most importantly, stopping the heel lifting.
If your heel lifts then you are losing some of the responsiveness in your board as there's a delay in your movement being directed from your foot, through the binding, and into the board. This is particularly noticeable when you are on your toe edge. As you turn onto your toe edge, you rock forward in your boots, pushing your weight through the balls of your feet and onto the edge of the board.
If your heel lifts as you do this movement, then it means that the board is being left behind. This delay in responsiveness can cause a range of problems at all levels of ability. You can catch edges when turning and struggle to get good edge control when carving or spinning off jumps and it means the muscles in your feet and ankles are having to work extra hard to do the same thing.
What causes heel lift?
There are many factors that can cause your heel to lift:
- Boots are too big/wide for your foot
- Poorly fitting boots
- Not tightening the boot properly
- Old, worn-out boots
Tighten your boots
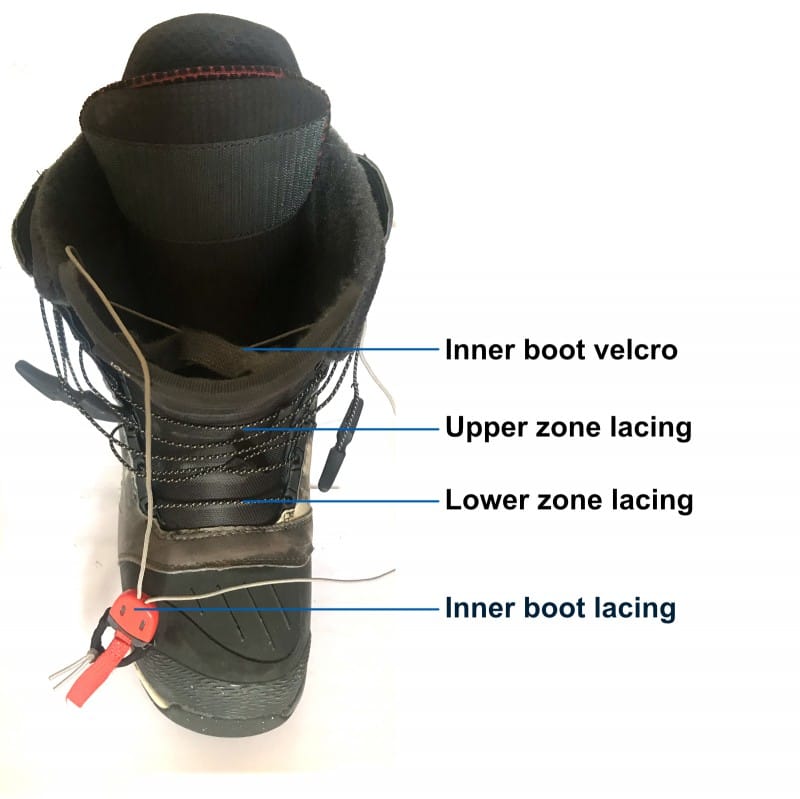
The obvious fix to heel lift is to tighten your boots. Start by making sure the inner boot is good and tight. Tightening the inner lace holds the inner boot to the outer boot and stops it from sliding around. Next, make sure the lower section of the outer boot lacing is tight. The lower laces full around the ankle and hold the heel down. Be careful not to over-tighten your boots as this can cut off the blood flow and cause your feet to cramp up.
Tighten your bindings
Another cause of heel lift could be that your bindings aren’t tight enough. Make sure you’ve got your bindings correctly set up, and that you have the correct size so that you can make your ankle strap tight. Old and worn ladders and buckles can mean that your bindings start to slip and loosen throughout the day.
If this is happening to you, then an inexpensive fix could be to replace old parts on your bindings and get them working like new. Most major binding brands supply replacement parts which you should be able to pick up for free or a couple of bucks from your local supplier.
Replace old boots
If you’ve correctly tightened your boots and bindings and you still are getting heel lift then maybe it's time to buy new boots. If your boots are old and you’ve recently started getting heel lift then it is probably because your old boots have packout too much and become soft. If this is the case then you’ll probably feel your feet moving around in all directions and that there’s little resistance and support in the front of the boot when you bend your ankle.
Buy better-fitting boots
If your boots are relatively new and you get heel lift, then it could be that they don't fit properly. In most cases this will be simply because the boots are too big. When buying new boots, your toes should just about touch the end of the boot. Then, when you flex forward into the boot, the toes should just back off from the end of the boot. That's a general rule for sizing up snowboard boots, but feet come in different shapes as well as sizes. It could be that your heel is lifting because you have narrow feet that aren't held securely by your particular boot. If this sounds like your foot shape then there are a few things you should look for when buying snowboard boots:
Heat moldable liners
Heat-moldable boots are made from a material that becomes malleable once heated. The warmed-up liner then takes the form of your foot and ankle once you’ve slipped them on. Once they’ve molded to your foot, your boot should not only be more comfortable but also have a better hold and support for your foot, helping to stop it from moving around in the boot.
Inner harness
This is a type of lacing system for the inner boot, which is found in mid-price and above snowboard boots. The inner boot sits inside the harness, which is attached to the heel of the outer boot. When the harness is tightened, the inner boot heel is held in place against the outer boot and stops the inner sliding up against the outer.
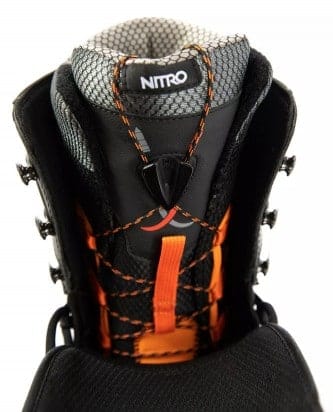
Lockable inner lacing system
Constantly having to redo your laces can get pretty annoying, especially on a cold day on the hill! A good lockable lacing system will keep your boots constantly stay tight throughout the day. Boots with speed lacing systems have lockable cleats that hold the laces tight. If you prefer traditional lacing systems, tray and opt for boots with lockable lace eyelets so that you can tighten and lock off the laces as you go.
Upper and lower lacing systems
Separate upper and lower lacing systems mean you can crank up the tightness on the lower part of the boot to hold your foot in position, leaving you to tighten the upper part as you like.
Fix Your Existing Boots
Obviously, swapping your boots for a new pair is an expensive fix to the problem. So, what else can you do to fix the heel lift? Here are a few relatively inexpensive tweaks which are worth trying out before you chuck out your boots and buy a new pair.
J bars
J bars are little foam pads that stick to the outside of your liner and fill up the space around your ankle so that your foot doesn't move. They were originally included with most Burton boots so that you could fine-tune your fit. Burton has stopped doing that now, but if you ask nicely they should send you a set. Alternatively, you can buy them here.
Butterfly wraps
Similar to J bars, butterfly wraps are little straps that stick to the outside of your snowboard boot lines. They are stuck just above your heel around the Achilles tendon in order to add extra support to the liner of the boot. These work best if the heel lift stems from skinny ankles and heels and are definitely worth a try before splashing out on a new pair of boots.
Thicker Custom Inner sole
Adding a thicker inner sole will lift your whole food up so that the heel has no extra space to lift it into. This can be a really effective way of eliminating heel lift and can also help make your boots more comfortable all around. Before you go down this route, make sure you haven't got any other issues with your feet such as a raised arch or flat feet. If you do then an inner sole custom-made for your specific foot shape can definitely a good solution to heel lift as well as other issues you may be experiencing.
I use these ones from Shred Soles and they're awesome!
Wrapping up.
There are a bunch of different solutions to fixing heel lift in your snowboard boots, from the simple and inexpensive to just chucking your old boots out and splashing out on a new pair. The one thing you definitely shouldn't do is to just put up with it. A heel lift can really hold you back in your snowboard and getting it fixed could be the path to an instant improvement.